
TT Hongli MG 1/100 Exia Ignition Mode - Assembly Cure

These are the consolidated images of my fixes for the TT Hongli MG Exia Ignition Mode. This will be categorized as Step By Step GunPla found in my pages (tabs above) so if you're looking for fixes on bootleg kits, better check that page out. :)

With the Exia I.M.'s head, shave of this peg to be able to snap it fully.


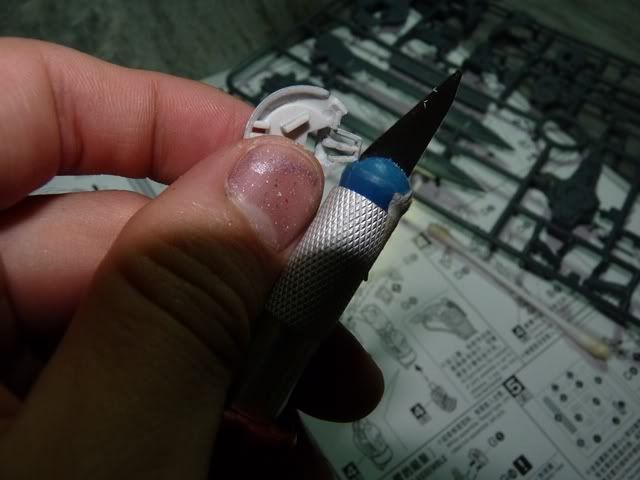
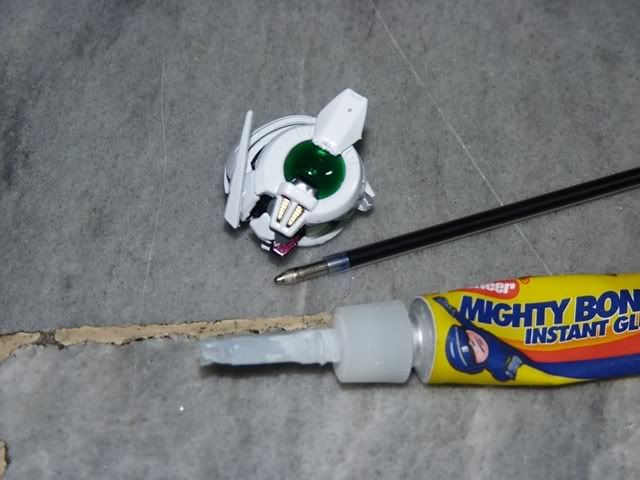
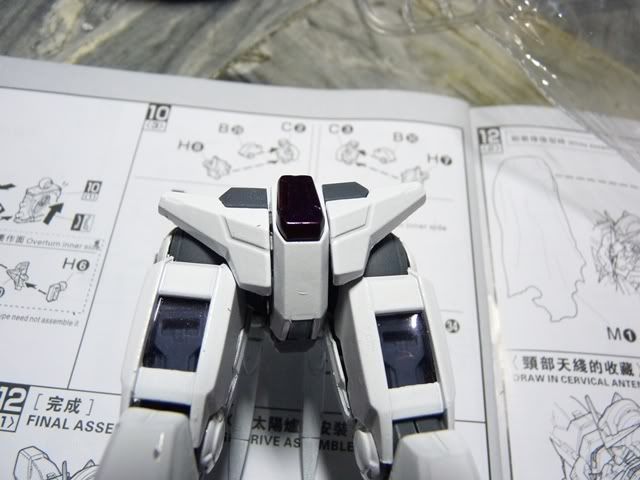
What I did here is glue Exia I.M.'s bunny ears. It keeps on falling off so glue the damn ears! You can use a toothpick (or the tip of a ball pen in my case) to control the ooze of your glue. Apply thinly.


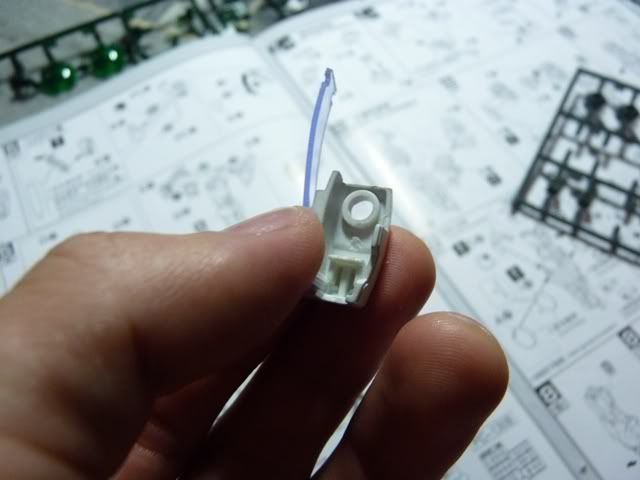
Shave off the male connector of the white part shown with a hobby knife or sand it with a low (rough) grit to thin it. It won't fit as smooth so..


Under the body, you'll need to shave the male connector. As you can see it does NOT fit very well. :(
Shaving or cutting the entire connector and then gluing does the trick.


Cut the male connector entirely. Apply glue on the seams thinly.


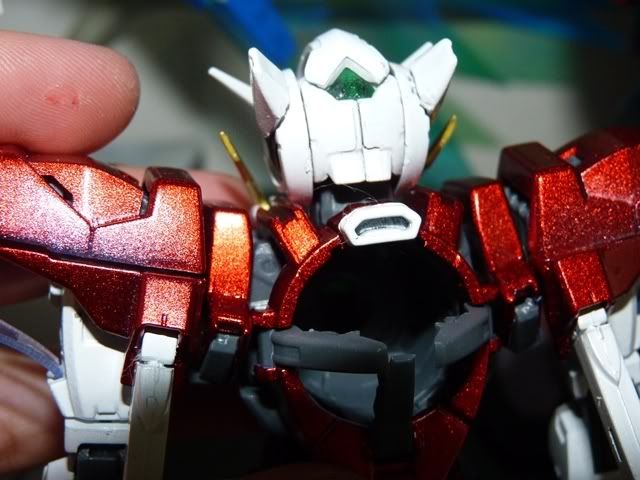
Glue the white part at the back. It doesn't have something to hold on to.


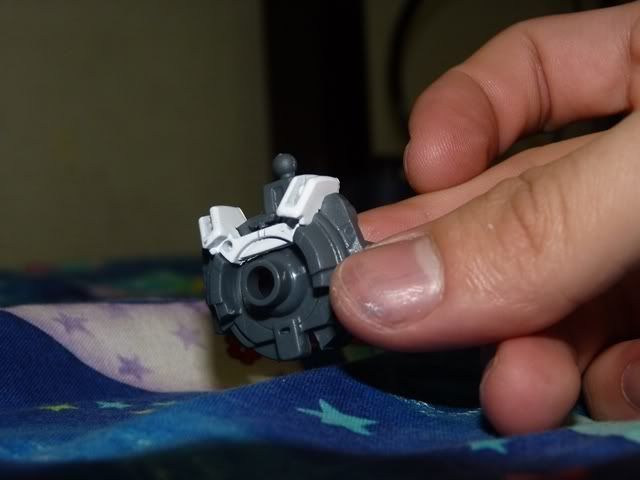
Glue the armor piece on the shoulder. It pops off easily.


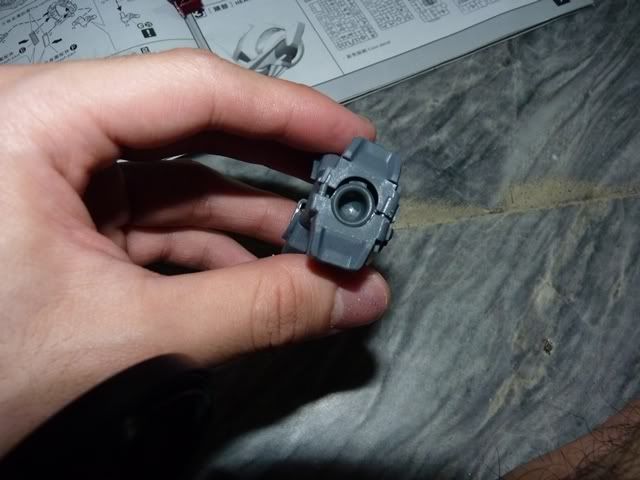
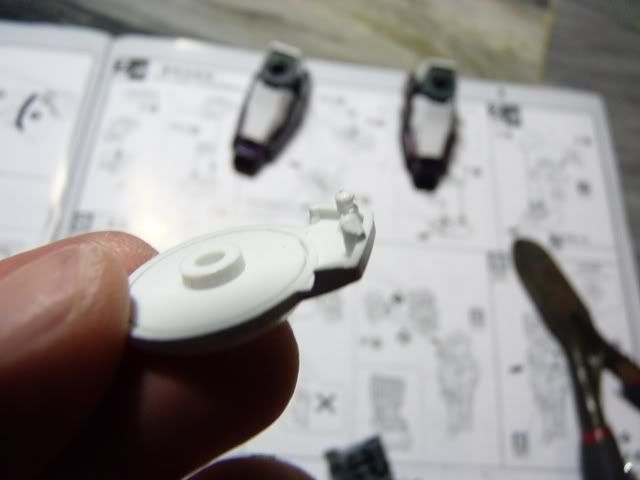
 Shave the male connectors of the leg armor like so


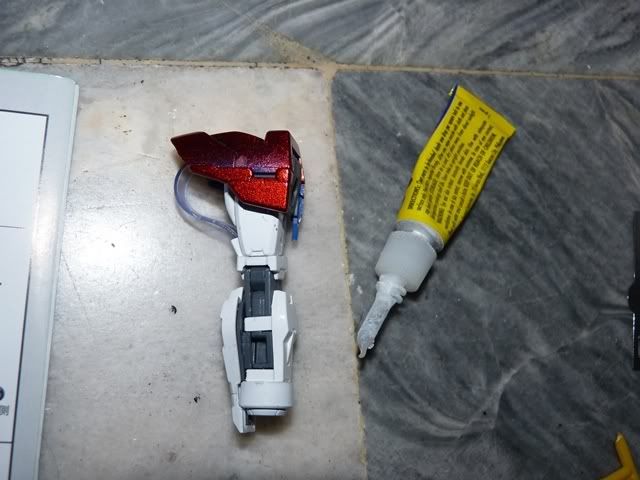
 The white armor keeps popping off. A simple thin application of glue would do the fix.


That's about it! I hope you find this page useful. Stick around to see my full review of Exia. :)

Comments

Popular posts from this blog

TT Hongli MG 1/100 Exia Ignition Mode - Review

Assembling bootleg kits can be a pain at times but this MG Exia Ignition Mode was a breeze. I was surprised from the fact that 90% went well and the other 10% were minor fixes - from shaving male connectors to gluing parts. I really enjoyed assembling my first Master Grade (I was hoping it was Bandai, my wallet was not cooperating as expected lol). Action! G...Gu...Gundaaaaaam!!!!!!!!!!! GUUUUNDAAAAMU!!! Ore wa........... Ore Wa Gundam-da!! Exia exterminating target............... Graham: Ike, Setsuna! Live and unlock the future! More swords Setsuna? Target exterminated! Joining the bunch :D Pros: Assembling is pretty easy for a bootleg Build is sturdy It came with LEDs! Cons: Joints are too stiff (for my liking, anyways, it made the kit solid though) Swords at his wait does not fit the peg in the hand Exia Repair parts does need half of the non-Repair head. (didn't bother with the transformation) The Exia Ignition Mode is a must have! I'm really g

RIP Crimson Comet

Photobucket has kidnapped my photos and I'm too lazy to re-upload and update every bit. It's been worthwhile. I'm intending to start a new blog that is more "personal" than just focus on one part of my hobby. Looking at my older posts, I can fairly say I've improved on my toy photography (and English!) in which I am thankful for this space as a medium to share my work. Thank you for reading up to this part! Cheers for 7 years!

QY SD God Gundam - Mini WIP, Assembly Cure and Review

Thank GOD I'm back! Lumix is back and my GunPla energy has been over the top! I'm feeling good this morning and built Gundam Alex. Well more on that next time, but again, thank GOD I can finally review my QY God Gundam! Starting off, here is the box of QY's bootleg of God Gundam (Deitg Warrior). Unboxing this miniscule kit, there are only 5 runners along with the polycaps. ..And here's my bootleg Unicorn (mfg by Jargon), envious why he does not have a review. Issue 01: Starting off our assembly cure, carefully shave off the chest piece by a hobby knife to snugly fit it into the chest armor. Issue 02: Like most of my QY kits, head continues to be problematic. Cut the male connectors and apply glue to the seams. Issue 03: Waist armor male connectors are too thick. Shave by a hobby knife or sand it down to fit the pieces. Issue 04: Arms too have fitting issues. Cut the male connectors and then glue. Make sure you do not forget the poly cap when gluing! Is