
TT Hongli MG 1/100 Exia Ignition Mode - WIP 02

Well, today is my second day in an attempt to finish the Exia I.M.. Moving on from the upper body and head on my WIP 01, comes the arms and lower body. I believe I was jinx because of praising this kit's slight imperfections before. Well, none of it are outstanding, it was just annoying of how you'll snap the pieces together on tilted positions.

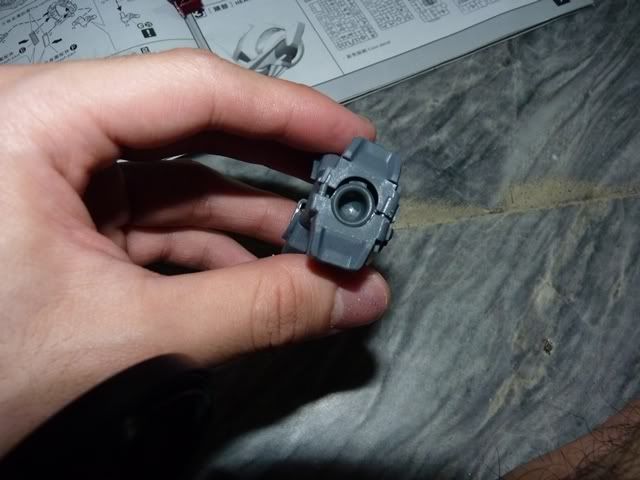
Under the body, you'll need to shave the male connector. As you can see it does NOT fit very well. :(
Shaving or cutting the entire connector and then gluing does the trick.


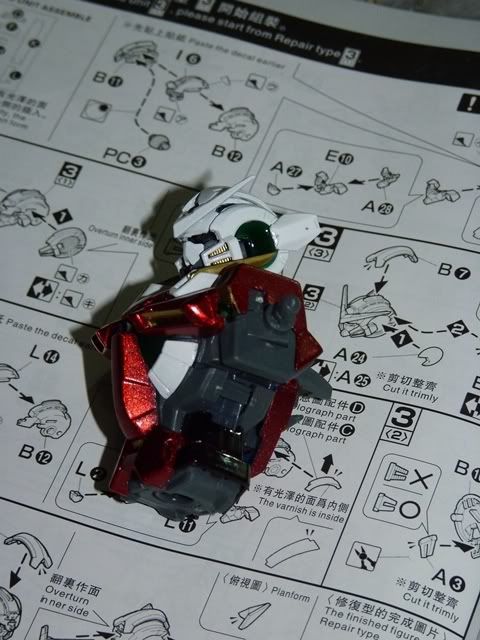
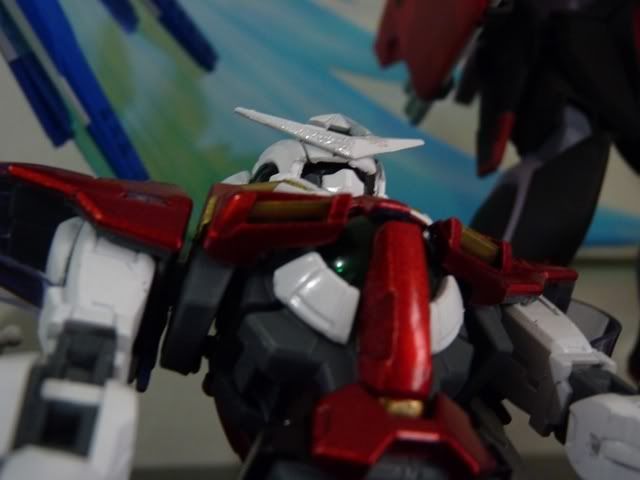
I'm really loving the side vents of Exia hahaha! The gold Gundam Marker really looks awesome!


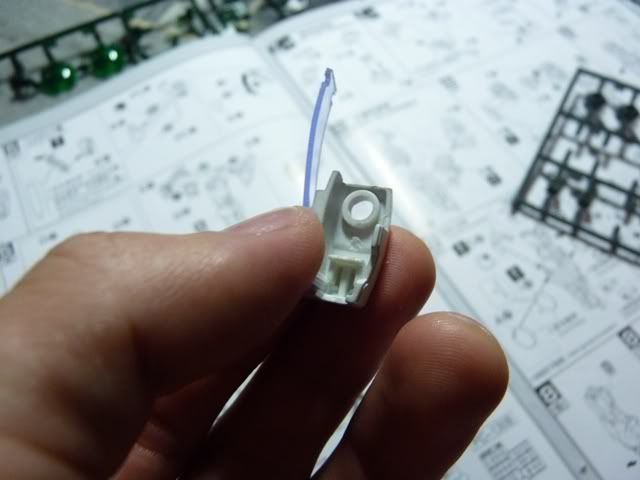
This is the part that gets a little bit tricky (and annoying!). See the holograph part there? You need to assemble and jam it into the inner frame of the shoulders.

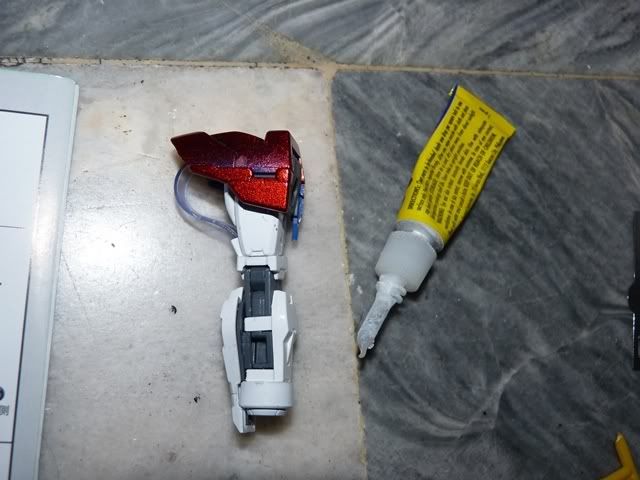
Cut the male connector entirely. Apply glue on the seams thinly.


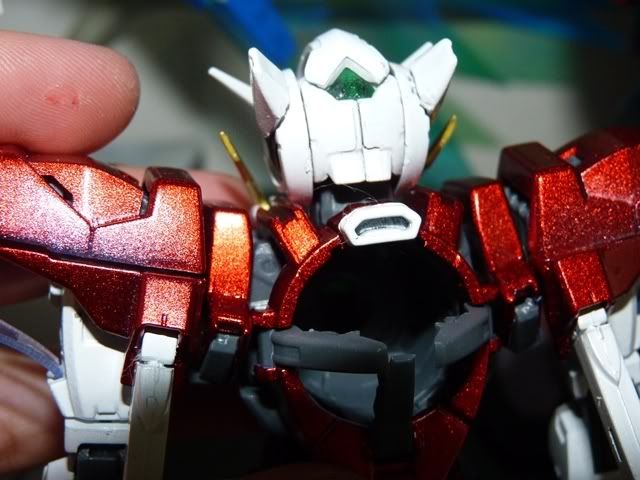
Forgot to mention, glue the white part at the back. It doesn't have something to hold on to.


Glue the armor piece on the shoulder. It pops off easily.


Here's my progress so far


Little hiccups with the arms and I found it very annoying to assemble (well, not really haha but it was fun). The joints are too stiff for my taste so you need to play around it a little to make it loose.


Comments

Popular posts from this blog

TT Hongli MG 1/100 Exia Ignition Mode - Review

Assembling bootleg kits can be a pain at times but this MG Exia Ignition Mode was a breeze. I was surprised from the fact that 90% went well and the other 10% were minor fixes - from shaving male connectors to gluing parts. I really enjoyed assembling my first Master Grade (I was hoping it was Bandai, my wallet was not cooperating as expected lol). Action! G...Gu...Gundaaaaaam!!!!!!!!!!! GUUUUNDAAAAMU!!! Ore wa........... Ore Wa Gundam-da!! Exia exterminating target............... Graham: Ike, Setsuna! Live and unlock the future! More swords Setsuna? Target exterminated! Joining the bunch :D Pros: Assembling is pretty easy for a bootleg Build is sturdy It came with LEDs! Cons: Joints are too stiff (for my liking, anyways, it made the kit solid though) Swords at his wait does not fit the peg in the hand Exia Repair parts does need half of the non-Repair head. (didn't bother with the transformation) The Exia Ignition Mode is a must have! I'm really g...

SH Figuarts Rockman Zero - Review

Human and reploidkind's last hope: His name is ZERO....? Slide! Z-Saber GET Love the translucent piece L'Oréal ambassador Ryuenjin!!! ...is always followed by Hyouretsuzan If you're a Maverick and hears: Hoooooooo- Haaaaaaa- Hoooooooooooooo!!!!!!!!!! Zero's fundamental 3-combo SLASH Triple Rod Looks sick! Shield Boomerang Super hero lan.... Ugh.... Buster Shot Pew pew pew Who am I...? Pros: Weapons Sculpt is spot on Cons: Articulation plenty but a bit restrictive compared to newer releases by SHF Rockman Zero builds on a new era from the X series. It brings BACK the fun of what the blue bomber and red slasher should be - the best side scrolling game in which the X7 and X8 failed to deliver. Rockman Zero was the sav...

RIP Crimson Comet

Photobucket has kidnapped my photos and I'm too lazy to re-upload and update every bit. It's been worthwhile. I'm intending to start a new blog that is more "personal" than just focus on one part of my hobby. Looking at my older posts, I can fairly say I've improved on my toy photography (and English!) in which I am thankful for this space as a medium to share my work. Thank you for reading up to this part! Cheers for 7 years!