
Bandai RG Aile Strike - WIP 03

Funky weather delayed my progress yet again. Ran out of top coat when I was about to put the finishing touch on the Aile pack. Worry not!

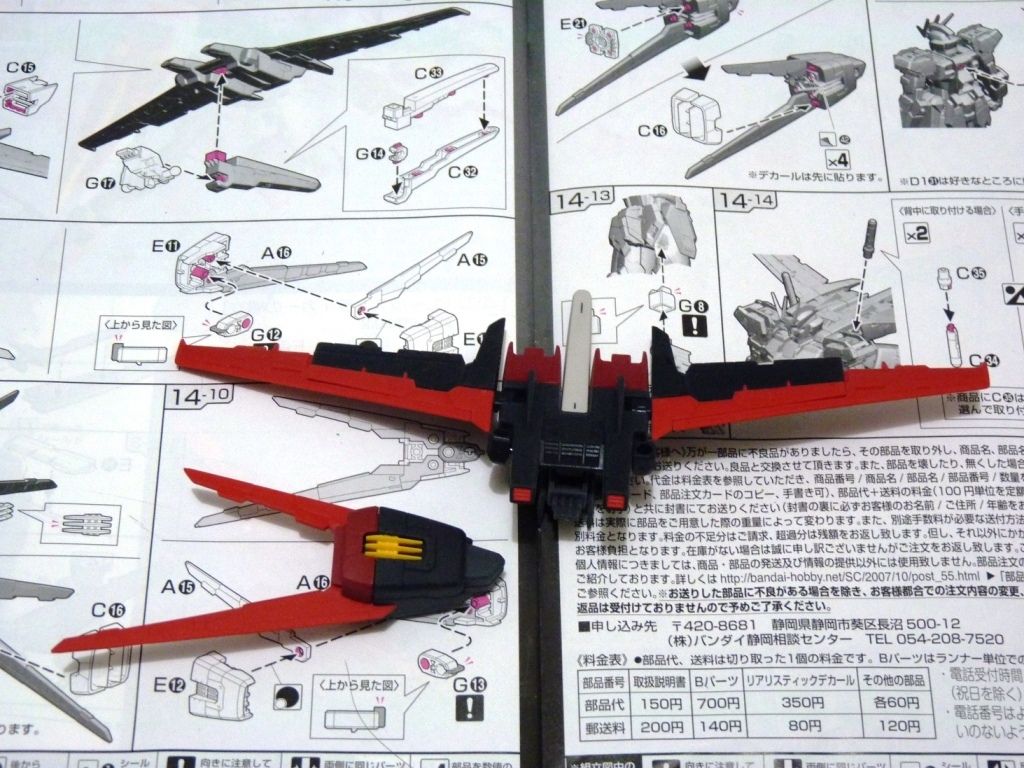
Aile pack assembly was surprisingly easy. Looking at it gave an impression that the pack is complex and assembly will be daunting. Looks can sure be deceiving >:)


With that out of the way, all that's left are the stickers! Still awed by the Aile Strike pack's design.


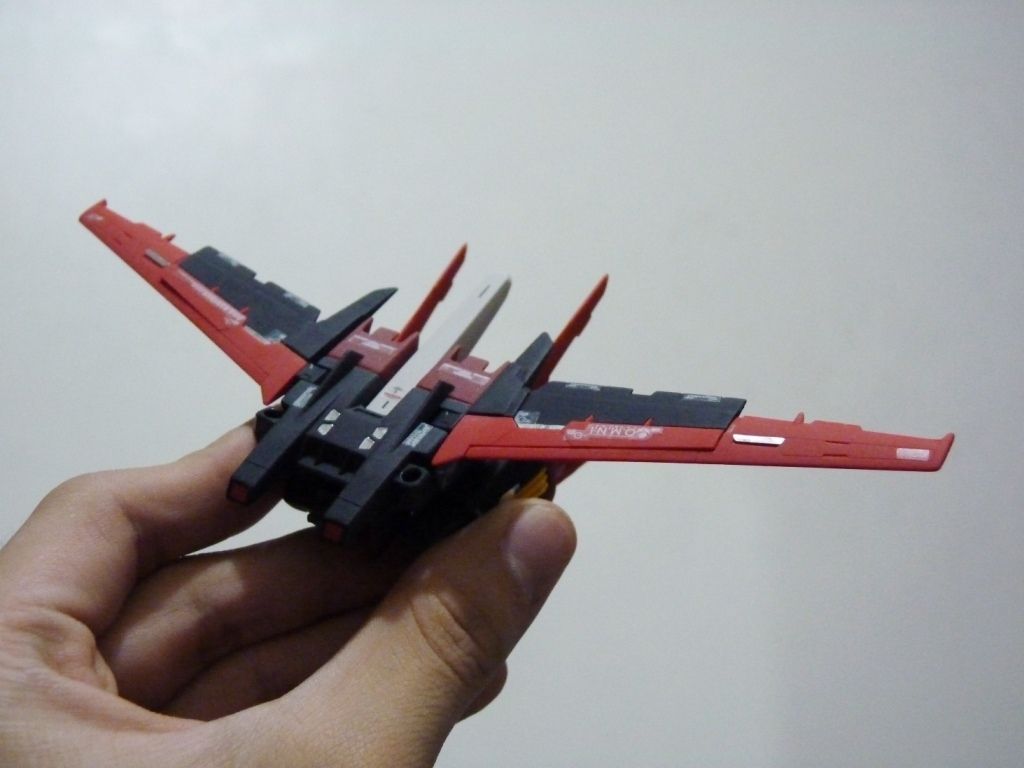
.....And we're done!

I have lost internet connection for a couple of days. I thought it did good (in the name of GunPla) as boredom gave me the urge to do something. Oh, and PLDT MyDSL customer support hotline sucks. They put customers on hold for more than 30mins! Assembled parts for the pack while waiting lol. And it didn't happen only once, twice, or thrice mind you! Called them at least twice a day for 5 days! /rantover *sigh*

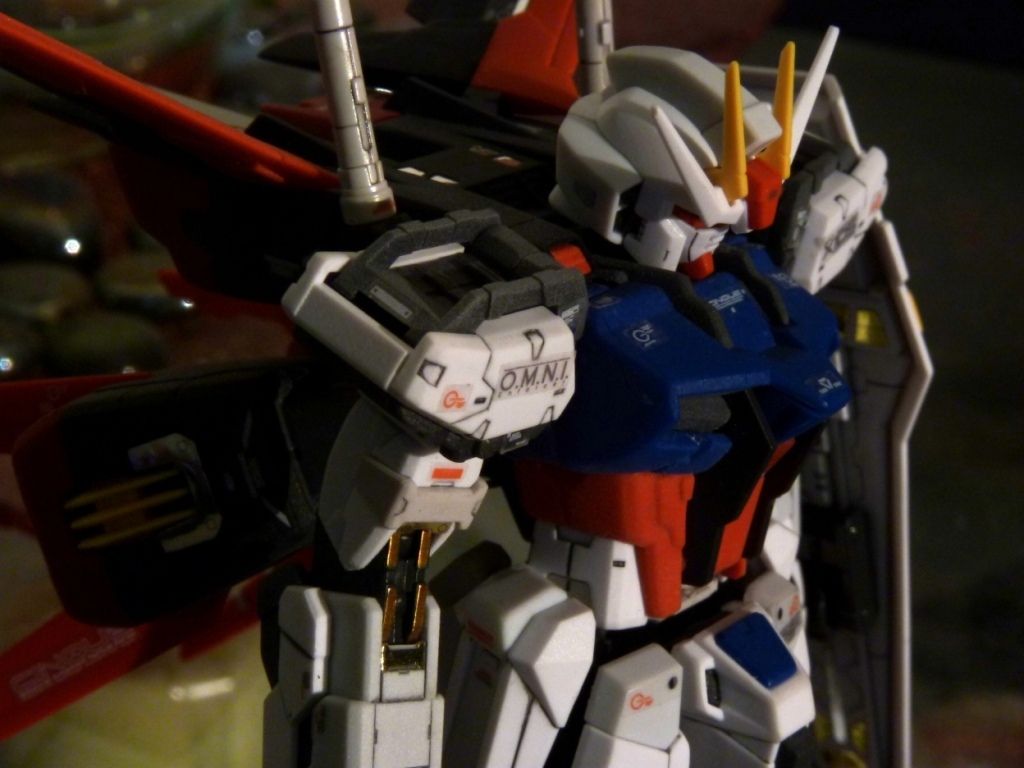
Glad I'm back online! Watch out for the review soon. Cheers!

Teaser

Comments

Popular posts from this blog

TT Hongli MG 1/100 Exia Ignition Mode - Review

Assembling bootleg kits can be a pain at times but this MG Exia Ignition Mode was a breeze. I was surprised from the fact that 90% went well and the other 10% were minor fixes - from shaving male connectors to gluing parts. I really enjoyed assembling my first Master Grade (I was hoping it was Bandai, my wallet was not cooperating as expected lol). Action! G...Gu...Gundaaaaaam!!!!!!!!!!! GUUUUNDAAAAMU!!! Ore wa........... Ore Wa Gundam-da!! Exia exterminating target............... Graham: Ike, Setsuna! Live and unlock the future! More swords Setsuna? Target exterminated! Joining the bunch :D Pros: Assembling is pretty easy for a bootleg Build is sturdy It came with LEDs! Cons: Joints are too stiff (for my liking, anyways, it made the kit solid though) Swords at his wait does not fit the peg in the hand Exia Repair parts does need half of the non-Repair head. (didn't bother with the transformation) The Exia Ignition Mode is a must have! I'm really g

RIP Crimson Comet

Photobucket has kidnapped my photos and I'm too lazy to re-upload and update every bit. It's been worthwhile. I'm intending to start a new blog that is more "personal" than just focus on one part of my hobby. Looking at my older posts, I can fairly say I've improved on my toy photography (and English!) in which I am thankful for this space as a medium to share my work. Thank you for reading up to this part! Cheers for 7 years!

QY SD God Gundam - Mini WIP, Assembly Cure and Review

Thank GOD I'm back! Lumix is back and my GunPla energy has been over the top! I'm feeling good this morning and built Gundam Alex. Well more on that next time, but again, thank GOD I can finally review my QY God Gundam! Starting off, here is the box of QY's bootleg of God Gundam (Deitg Warrior). Unboxing this miniscule kit, there are only 5 runners along with the polycaps. ..And here's my bootleg Unicorn (mfg by Jargon), envious why he does not have a review. Issue 01: Starting off our assembly cure, carefully shave off the chest piece by a hobby knife to snugly fit it into the chest armor. Issue 02: Like most of my QY kits, head continues to be problematic. Cut the male connectors and apply glue to the seams. Issue 03: Waist armor male connectors are too thick. Shave by a hobby knife or sand it down to fit the pieces. Issue 04: Arms too have fitting issues. Cut the male connectors and then glue. Make sure you do not forget the poly cap when gluing! Is