
Bandai RG RX-78-2 Gundam - WIP 03

Other progress are delayed but I managed to take these photos way before my Lumix went out to the seas (take care!). This is just the assembly of the armaments and core fighter of my RG RX-78-2.

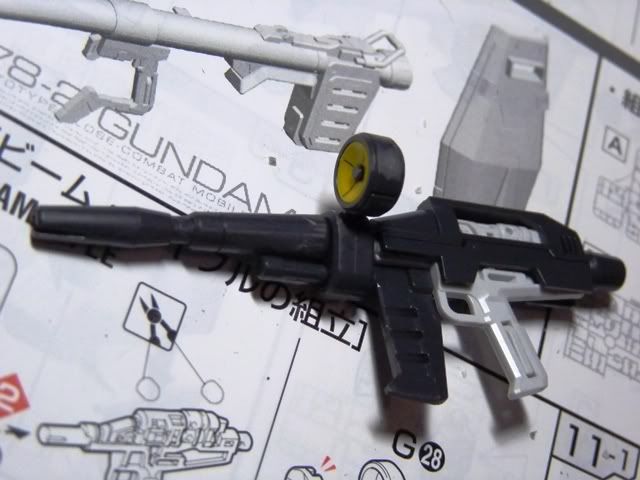
Beam rifle is pretty with the black - white color scheme. This is one of the few changes the RG version has


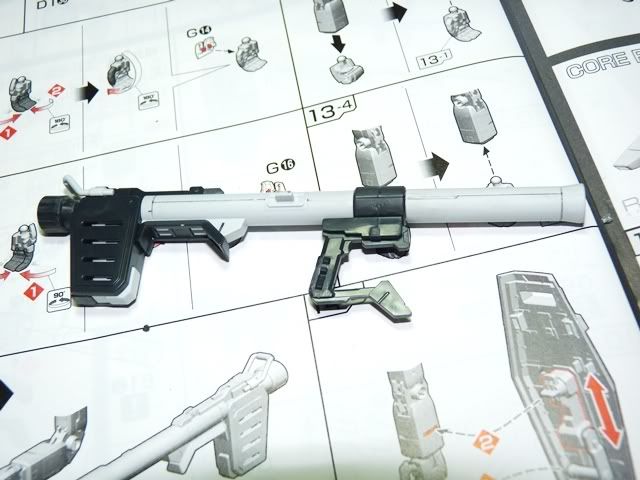
Again, not paying attention to detail, I almost snapped the Hyper Bazooka's handle because I forced it in during assembly. Good thing it didn't break and the chip from the grind were managed by sanding. Stress mark though looks awful :(


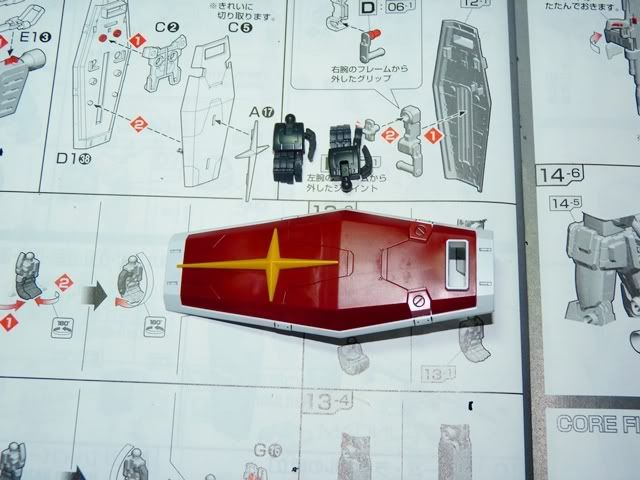
Shield has no problems when assembling and the two shades of red give a little more excitement


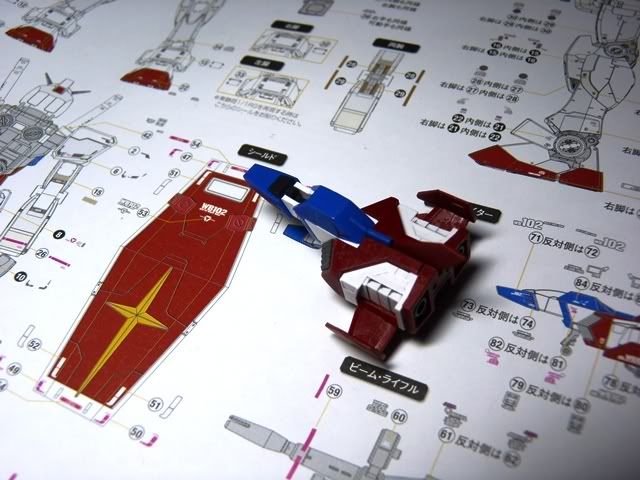
Core fighter is SWEET! Decal application on this guy is one hell of a job but I managed anyways LOL


An update on my hauls - I've sold my MG Quan[T] w/ LED so you probably won't seeing a Setsuna MS here anytime soon. I have decided that MG's are not my thing anymore (not closing the doors on that line though) since assembling those beasts are a bit stressful on my lifestyle. Focused solely on 1/144 scale HG and RG scale for its vast collection of released MS's. Probably next year I'll start collecting the MG Endless Waltz series for memories of Wing has what started GunPla for me. The kits look awesome while not being too fancy so I think assembly of those would be a breeze.

Oh, I was able to snag a rare kind at a local shop - SD Zeta and SD Nu Gundam bundle. I was surprised that it was NOT overpriced as the other kits laying around and what made me buy it in a heartbeat was that it came with decals. COOL!

Comments

Popular posts from this blog

TT Hongli MG 1/100 Exia Ignition Mode - Review

Assembling bootleg kits can be a pain at times but this MG Exia Ignition Mode was a breeze. I was surprised from the fact that 90% went well and the other 10% were minor fixes - from shaving male connectors to gluing parts. I really enjoyed assembling my first Master Grade (I was hoping it was Bandai, my wallet was not cooperating as expected lol). Action! G...Gu...Gundaaaaaam!!!!!!!!!!! GUUUUNDAAAAMU!!! Ore wa........... Ore Wa Gundam-da!! Exia exterminating target............... Graham: Ike, Setsuna! Live and unlock the future! More swords Setsuna? Target exterminated! Joining the bunch :D Pros: Assembling is pretty easy for a bootleg Build is sturdy It came with LEDs! Cons: Joints are too stiff (for my liking, anyways, it made the kit solid though) Swords at his wait does not fit the peg in the hand Exia Repair parts does need half of the non-Repair head. (didn't bother with the transformation) The Exia Ignition Mode is a must have! I'm really g

RIP Crimson Comet

Photobucket has kidnapped my photos and I'm too lazy to re-upload and update every bit. It's been worthwhile. I'm intending to start a new blog that is more "personal" than just focus on one part of my hobby. Looking at my older posts, I can fairly say I've improved on my toy photography (and English!) in which I am thankful for this space as a medium to share my work. Thank you for reading up to this part! Cheers for 7 years!

QY SD God Gundam - Mini WIP, Assembly Cure and Review

Thank GOD I'm back! Lumix is back and my GunPla energy has been over the top! I'm feeling good this morning and built Gundam Alex. Well more on that next time, but again, thank GOD I can finally review my QY God Gundam! Starting off, here is the box of QY's bootleg of God Gundam (Deitg Warrior). Unboxing this miniscule kit, there are only 5 runners along with the polycaps. ..And here's my bootleg Unicorn (mfg by Jargon), envious why he does not have a review. Issue 01: Starting off our assembly cure, carefully shave off the chest piece by a hobby knife to snugly fit it into the chest armor. Issue 02: Like most of my QY kits, head continues to be problematic. Cut the male connectors and apply glue to the seams. Issue 03: Waist armor male connectors are too thick. Shave by a hobby knife or sand it down to fit the pieces. Issue 04: Arms too have fitting issues. Cut the male connectors and then glue. Make sure you do not forget the poly cap when gluing! Is